
Settings Breakdown
High ISO is essential to capture faint starlight. Most modern cameras handle ISO 3200-6400 well. Stack multiple exposures to reduce noise in post.
Wide open aperture gathers maximum starlight. Fast lenses (f/1.4-2.0) are ideal. Stopping down even one stop halves your light — stay wide.
Use the 500 Rule: 500 ÷ focal length = max seconds. At 24mm on full frame: 500÷24 = 20 seconds max before star trails appear.
Autofocus fails in darkness. Use Live View zoomed to 10x on a bright star. Adjust until the star is the smallest possible point.
Shoot RAW and adjust later, but a starting point around 4000-4500K preserves natural star colors without making the scene too warm or cold.
Wide angle captures sweeping Milky Way arcs and allows longer exposures. 14-20mm is ideal for dramatic compositions including foreground.
Essential Gear for Milky Way
Fast wide-angle lens
Going from f/4 to f/1.8 more than doubles the starlight you capture in the same 20 seconds.
See mount picksSturdy tripod
15–25 second exposures: any wobble smears stars into dashes.
View on AmazonRed headlamp
White light ruins night vision. Red light lets you change cards without flooding the scene.
View on AmazonIn the Frame
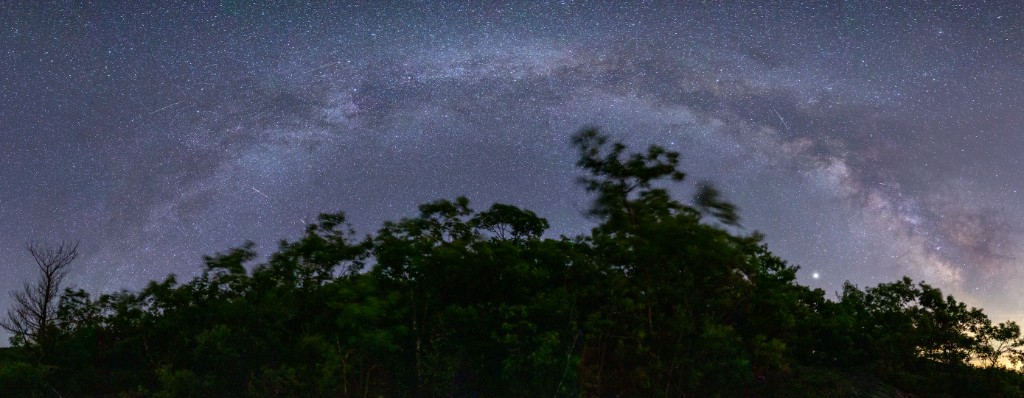
Early in the season
The band lies low across the sky. Shoot in landscape orientation, keep the horizon near the lower third, and let the band run across the frame. A full arch is a panorama.
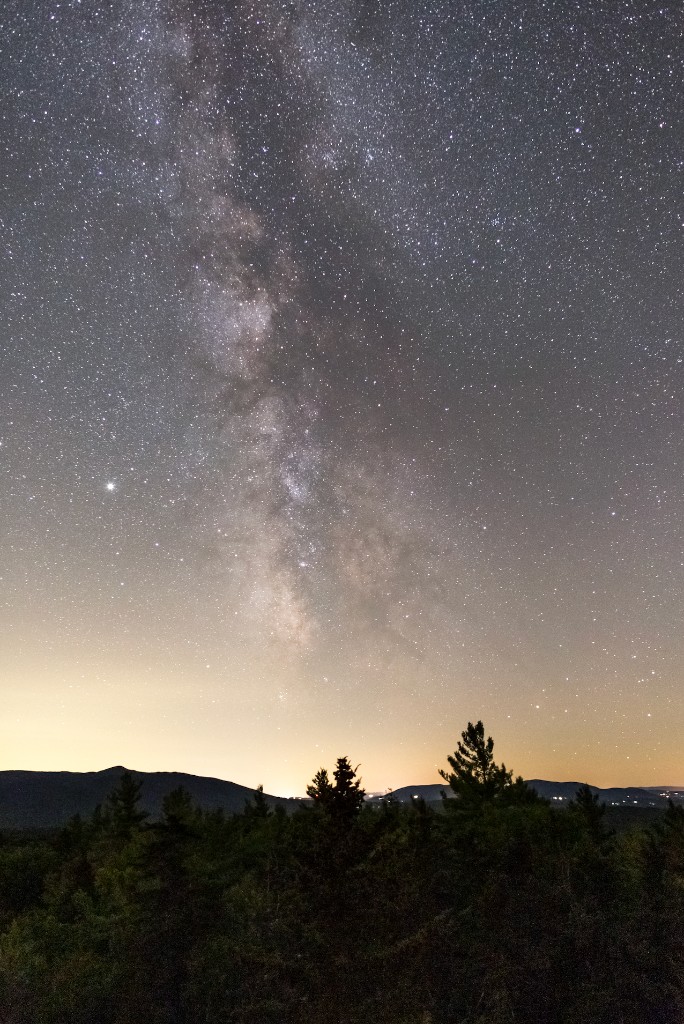
Mid season
The core stands upright. Turn the camera to portrait and set the core beside one subject, not centered over an empty horizon.
One subject
A tree, a ridge, a rock, a still lake. A row of equal shapes gives the core nothing to stand next to.
Distance
Focused on the stars, a full-frame 14 mm lens at f/2 is sharp from about 3 meters out. At 24 mm, from about 10 meters. Anything closer needs its own frame, focused on the ground.
The Foreground Frame
Its own frame
A clean ground comes from its own frame, shot from the same tripod at the same focal length.
Blue hour first
Shoot the ground in the last light, then leave the tripod alone until the sky is dark enough for the sequence.
After the sky
Shoot the sky sequence, then the ground as one longer exposure at a lower ISO, or with one brief, dim pass of light. A bright lamp fogs the sky.
If it's close
If it is closer than about 3 meters at 14 mm, or 10 meters at 24 mm, focus that frame on the ground. Leave the sky frames at star focus. Blend along the horizon with a soft mask. Trees and rock edges against the sky need a careful edge, or a halo shows.
Pro Tips
Find Dark Skies
Light pollution kills Milky Way photography. Use dark sky finder apps/maps and travel to locations with Bortle class 3 or lower for best results.
Time It Right
Milky Way core is visible March-October (northern hemisphere). Check moon phase — shoot during new moon or when moon has set for darkest skies.
Use Planning Apps
PhotoPills, Stellarium, and Star Walk show exactly where and when the Milky Way will be positioned. Plan your composition before arriving.
Shoot Separate Foreground
Take one exposure for stars, another for foreground (light painted or blue hour). Blend in post for best of both without noise compromise.
Let Eyes Adapt
It takes 20-30 minutes for full dark adaptation. Avoid phone screens, use red light. You'll see more of what you're photographing once adapted.
Consider a Star Tracker
Motorized trackers follow star motion, allowing multi-minute exposures at low ISO. Dramatically improves image quality for serious astrophotography.